
Bubbles, edge lift, wrinkles, colour shifts, and misplaced labels can originate in the label, mould, resin, placement system, or moulding cycle. By separating those causes and recording the right evidence, you can identify the failing stage, set acceptance limits, and decide whether to correct the IML process or choose another labelling method.
Key takeaways
- Classify the defect as print, position, surface, or moulded-part failure.
- Check label position, air traps, and container fit before changing machine settings.
- Separate moulding conditions from print and fusion failures during diagnosis.
- Set measurable acceptance criteria before approving a controlled production trial.
Start With the Defect Pattern, Not the Printer
A defect pattern tells you more than the printer’s name. Classify it first as a print defect, label-position defect, surface defect, or moulded-part defect.
In mould labels for Mumbai, defects and problems become easier to trace when the inspection record includes cavity number, label reel and splice, orientation, defect location, mould temperature, cycle time, vacuum status, and resin batch.
Use the recurring pattern to narrow the source:
- A smear, ink transfer, pinhole, or delamination on the ink side points to incomplete drying, weak ink adhesion, or insufficient film treatment. Run a tape or ink-adhesion test after reel conditioning, not only after printing.
- Silvering, bubbles, or cloudy patches indicate trapped air. Check blocked vents, obstructed vacuum holes, a label sitting unevenly, and a cut that is too large for the cavity.
- Edge lift, visible seams, or poor fusion points to film-resin incompatibility, especially when PP containers use a non-PP label system.
- Uneven placement, repeated orientation errors, or labels shifting before injection point to vacuum loss, static charge, gripper timing, cavity alignment, or operator loading.
- Short shots, distorted graphics, and mould marks point to injection or cooling conditions. Compare cavity, melt temperature, injection speed, holding pressure, and cooling time before blaming the label.
Do not treat in mould labels problems as adhesive problems: standard systems fuse with molten resin rather than using pressure-sensitive glue. For mould label defects that appear only after storage, inspect reel tension, drying balance, and curl in both machine and transverse directions. Track each result by cavity and resin batch before changing machine settings.
Fix Label Position, Air Traps, and Container Fit Before Changing Settings
Check the label, cavity, and pick-up path before changing injection settings. Inaccurate placement often starts with die-cut burrs, excessive stack pressure, static, a warped stack, or film with too little stiffness. Compare the first and last labels in the stack, then record pick-up failures by cavity; a feeder-only failure points away from the mould.
1. Confirm release and alignment. Vacuum loss, blocked suction holes, weak electrostatic holding, worn grippers, or mistimed robot movement can create wrinkles, folds, and creases before mould closure. Release the label after it reaches the cavity face but before closing traps it against an edge. Check cavity alignment and label dimensions before altering robot speed.
2. Check flatness and air escape. Edge curl from reel tension, uneven drying, film-side imbalance, or hot, compressed storage creates local air pockets and visible lift. Condition the stack flat and inspect curl in both machine direction and transverse direction.
For mould labels mumbai production lines, inspect mould vents and vacuum holes for blockage; oversized labels can also trap air, causing bubbles, silvering, or cloudy patches.
3. Verify container fit and material compatibility. A label that exceeds the cavity contour gives poor coverage, edge curl, or folded corners. PP containers need a PP-based label film with compatible inks; an incompatible layer produces poor fusion, seams, and later delamination.
Most in mould labels problems become obvious through these checks. Mould label defects that remain after flatness, pick-up, venting, and fit are confirmed then justify controlled changes to timing, pressure, or temperature.
Separate Moulding Conditions From Print and Fusion Failures
For in mould labels problems, separate a moulding fault from a printed-label failure by checking whether the defect follows the cavity or the label reel. A short shot, mould mark, uneven coverage, or repeated wrinkle in one cavity points to mould temperature, blocked vents, vacuum loss, injection speed, holding pressure, or label movement.
In blow moulding, parison temperature, inflation pressure, stretch, and cooling time can distort a sound label.
Check these signatures:
- Ink transfer, smearing, pinholes, and delamination usually begin before moulding. Incompletely dried ink, weak film adhesion, or insufficient surface treatment fails under melt heat and pressure. Run a tape or ink-adhesion test after reel conditioning, not only after printing.
- Edge lift, visible seams, and later delamination indicate incompatible label construction. A PP container normally needs a PP-based film and resin-compatible inks; a conventional pressure-sensitive adhesive system will not fuse like an in-mould label.
- Silvering, bubbles, and cloudy patches indicate trapped air. Inspect vents, vacuum holes, label flatness, and die-cut size before raising injection pressure; higher pressure can compress air against the label.
- Print distortion, colour mismatch, and scuffing require print-process checks: ink laydown, curing, coating, rub resistance, and colour approval. Do not correct these by changing mould settings.
For industrial labels mumbai and mould labels mumbai production, record cavity, reel or splice, resin batch, mould temperature, cycle time, and vacuum status. That record prevents a print defect from being blamed on the machine—or a machine defect from being blamed on the converter.
Run a Controlled Trial and Set Acceptance Criteria Before Production
Run a controlled trial across three production runs, changing one input at a time. Define pass limits before starting: print coverage, colour tolerance, label position in millimetres, bubbles per container, scuffed units, and moulded-part defects.
Record cavity number, label reel and splice, orientation, defect location, mould temperature, cycle time, vacuum status, resin batch, and rejected quantity. This prevents recurring in mould labels for Mumbai defects problems from being blamed on the converter without evidence.
Measure each defect as a rate, not an impression:
- Inspect a fixed sample from every cavity and run.
- Separate print, position, surface, and moulded-part failures.
- Test first and last labels in each stack for pick-up faults.
- Repeat the trial after checking static charge, grounding, ionisation, and humidity.
Compare systems against the same container and inspection limits:
| System | Main strength | Typical failure or cost to compare |
|---|---|---|
| In-mould label | Integrated decoration and no post-label application | Static, pick-up, venting, fusion, and cavity-fit losses |
| Pressure-sensitive label | Flexible late-stage application | Adhesive, edge-lift, application-speed, and liner waste |
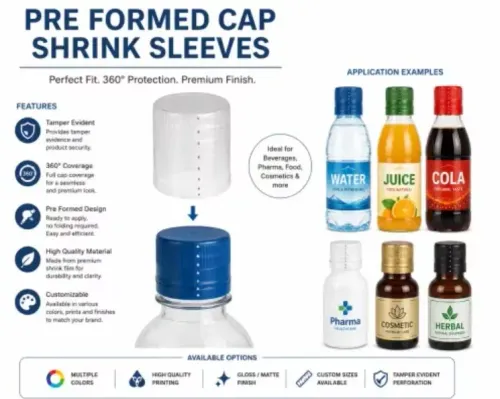
| Shrink sleeve | Full-body graphics on complex shapes | Shrink-tunnel control, distortion, trimming, and material use |
Calculate the practical cost of continuing: rejected units plus rework labour, machine downtime, destroyed resin and labels, inspection time, customer returns, and delayed dispatches. Divide the total by saleable units. Industrial Labels Mumbai buyers should choose the system with the lowest cost per accepted container, not the lowest label price.
Recheck the calculation after each corrective trial.
What to Ask an Industrial Label Supplier in Mumbai or Nagpur
Ask for evidence, not a promise that the supplier’s industrial labels Mumbai range will run on your line. For mould labels Mumbai trials, record the cavity, reel and splice, label orientation, resin batch, mould temperature, cycle time, and vacuum status so the supplier can trace repeat failures.
- Which film, ink, primer, and coating grades suit your resin and melt-temperature range?
- What die-cut tolerance, edge burr limit, stiffness, and label-to-cavity clearance do you guarantee?
- How do you control static charge, stack pressure, warped stacks, and double-picking?
- Which cavity shapes, suction-hole layouts, vacuum levels, and gripper systems have you tested?
- How do you approve colour: wet proof, press proof, or signed drawdown, and what colour tolerance applies?
- How do you check ink drying, adhesion, scuff resistance, pinholes, and delamination after conditioning?
- What reel, splice, batch, and inspection records accompany each delivery?
- Who investigates a defect, and what samples and machine data must you send?
Compare the supplier’s answer with the evidence they can provide.
| Question area | Acceptable evidence | Warning sign |
|---|---|---|
| Material and coating | Resin compatibility and temperature data | Generic film claim |
| Colour and consistency | Signed standard, batch comparison, inspection record | “Colour is close” |
| Troubleshooting | Cavity-by-cavity failure analysis | Blames moulding first |
For “in mould labels for mumbai defects problems,” ask Crystal Vision Packaging Co to separate print, label-position, surface, and moulded-part findings before recommending a change.
Related product
 | In-Mould Labels In-Mould Labels (IML) are pre-printed labels that are placed inside a mould before the plastic injection or blow moulding process. View product → |
Frequently asked questions
How should you begin diagnosing an in-mould label defect?
Start with the defect pattern and classify it as a print, label-position, surface, or moulded-part defect.
What should you check before changing moulding or printing settings?
Check label position, trapped air, and container fit before changing process settings.
How can you distinguish moulding problems from print or fusion failures?
Separate moulding conditions from print and fusion failures by examining where and how the defect appears.
What should you establish before production begins?
Run a controlled trial and agree on measurable acceptance criteria before approving production.
Keywords